You have years of legacy SAS code dating back to the time of your great-great-great-great grandparents (okay, SAS hasn’t been around quite that long). But, you want to automate your production jobs on your server and get your company into the modern era with version control and things like CI/CD. Oh, almost forgot, half your developers now want to include Python in your processes, right? So, you’ll need to be able to handle SAS, Python, and a mechanism for CI/CD and automation.
Your SAS developers are most likely scattered around the company. They like to use desktop applications like SAS Enterprise Guide, with a handful in the cloud on SAS Viya Workbench or SAS Analytics Pro. They might even say SAS can’t be modernized – but it most definitely can! And it will work well with your old SAS server just as easily as with the modern SAS analytics platforms like SAS Viya while integrating smoothly with Python.
The Python devs, well… Python can be the Wild West – VS Code, PyCharm, Spyder, Jupyter… the list goes on and on. When developing across languages, I personally like to use Viya Workbench because I have instant access to on-demand compute and can run both SAS and Python in the same dev environment, plus handle a lot of other things like shell scripts and yml.
Side note – yml or yaml, what gives? Are they the same? Do I say “yammel” or “why em el” when speaking to people so I don’t sound like a noob? Since we’re going to be working with GitHub ((i.e., Microsoft)) you’re going to see .yml extensions here. For all intents and purposes, yaml and yml are the same. It’s like the tabs vs. spaces debate in the show Silicon Valley – hilarious, yet entirely pointless. If you want to dive down the rabbit hole, see this fun Stack Overflow conversation: Is it .yaml or .yml?
The example I’m laying out is not idle curiosity on my part, but one I’ve recently encountered with a company. I want to walk you through the steps we took to meet their needs, with a few additions and changes to help clarify how to modernize a legacy SAS workflow integrated with Python. The complete example code can be found at this GitHub repo.
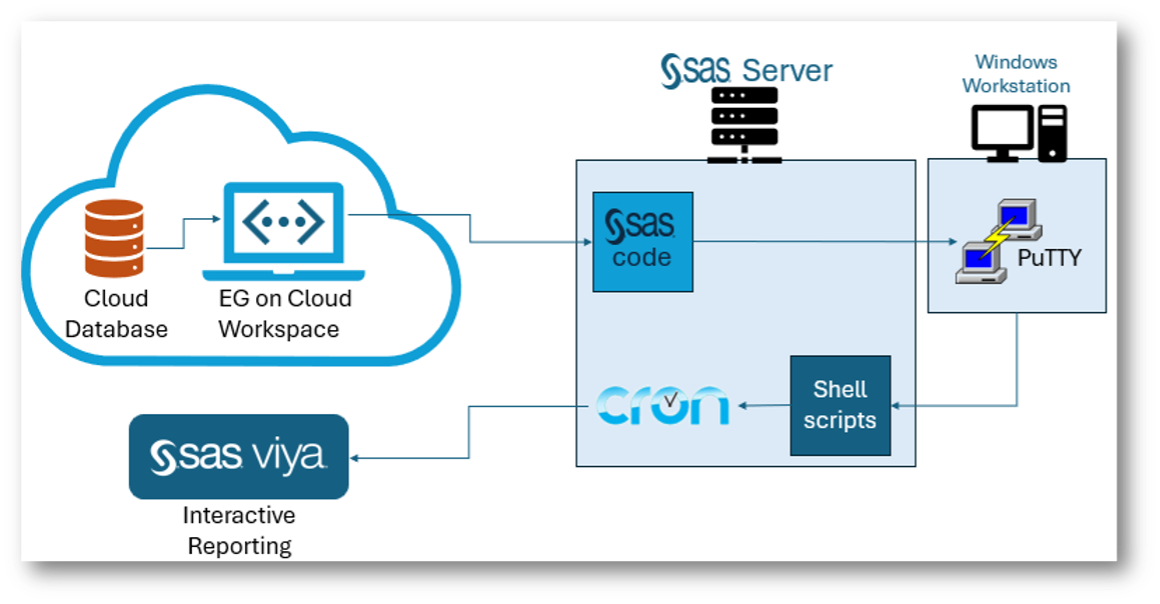
The basic legacy process is shown above. The goal is to simplify this process by removing PuTTY and automating the script generation, while ensuring the production server automatically gets the most recent code. Because this is a legacy process using Enterprise Guide (EG) projects, we necessarily start there. However, the process outlined below will work just as well with code.
I’ll be using a slew of tools including EG, Viya Workbench, and GitHub to show you how you can collaborate across multiple SAS and Python development environments while taking advantage of automation features in GitHub via Actions and Workflows.
Export the EG project to SAS code
My example company here has been using projects within EG for many years and doesn’t want to lose their legacy work within those projects while moving forward using Python and SAS for advanced analytics; so we’re going to start our journey in EG. By the way, EG now integrates with both Viya and Viya Workbench. If you’re unfamiliar with EG, you can skip ahead since I’ll simply be exporting the project as raw SAS code and working from there.

As you can see, I have a relatively simple project with a few process flows using both code and tasks. I’m using this project out of a GitHub repository that has a host of other things, including my automation scripts and code. To ensure my project plays nice with a Git repository, I have made sure to enable the relative paths for the project: Properties → File References → Use paths relative…

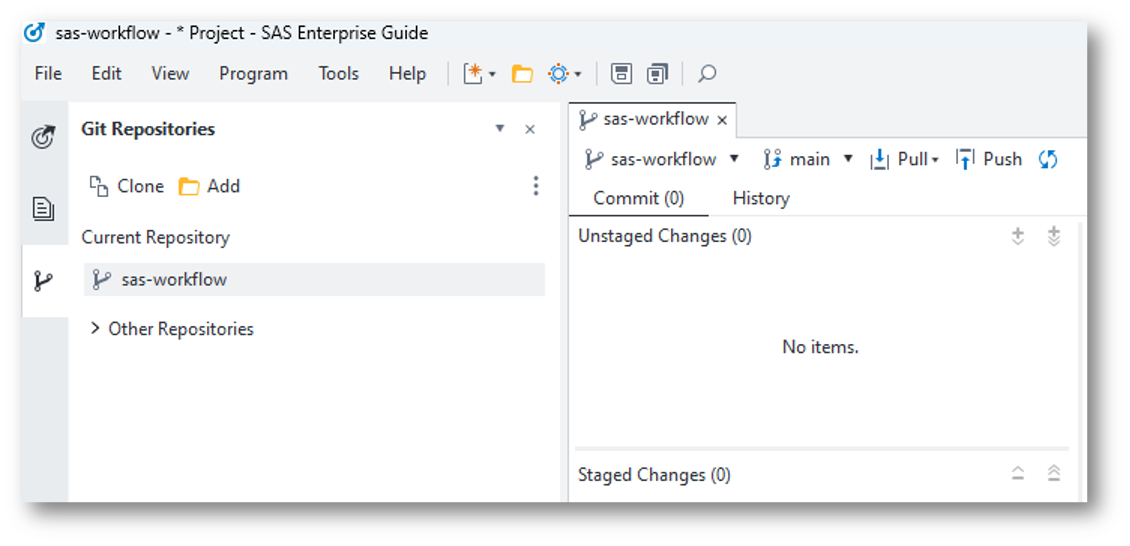
I’m also using the integrated Git features of EG to manage my project in GitHub from within the tool when working on my project.
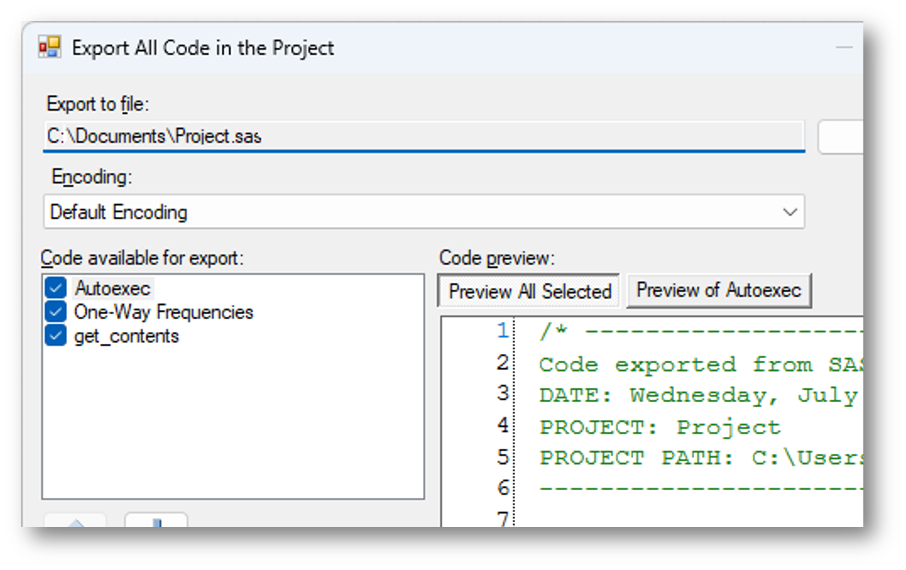
Since I am using legacy EG projects and don’t feel like pulling each piece of code out into its own file, I use the project level Share capability to Export All Code in Project.
Now I can continue to work with my EG Project, but collaborate with others using Viya Workbench or Viya through GitHub, and keep most of my legacy production process in place.
Let’s move into Viya Workbench now, which has both SAS and Python runtime environments and an IDE that can handle any programming language, which will come in handy here where we’re dealing with SAS, Python, shell (bash), and yml.
Integrate Python with the workflow
The team wants to begin leveraging Python for this workflow. SAS code can easily integrate with Python through system commands and proc Python, but in this case we’re going to take advantage of our GitHub action to run the necessary Python code and drop off data that our SAS code can pick up later. This approach has the advantage of letting the container running our action manage the Python package dependencies rather than having to manage those dependencies manually on our production server. Your IT team may either love you for this approach that doesn’t require them to maintain Python on the company server, or hate you because they are losing control.
Let’s add some Python code and test it out so we can see how our Python devs can join in the fun. To keep things simple, I’m going to create two files: one is a requirements file that will later inform our GitHub Action about the necessary Python dependencies, and the other contains the actual code.
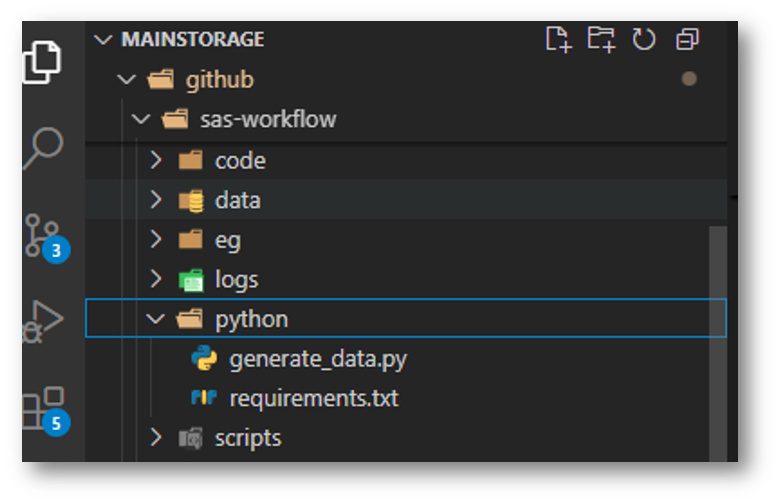
And here are the contents of the files side-by-side. On the left is the requirements text file and the right is the Python script.
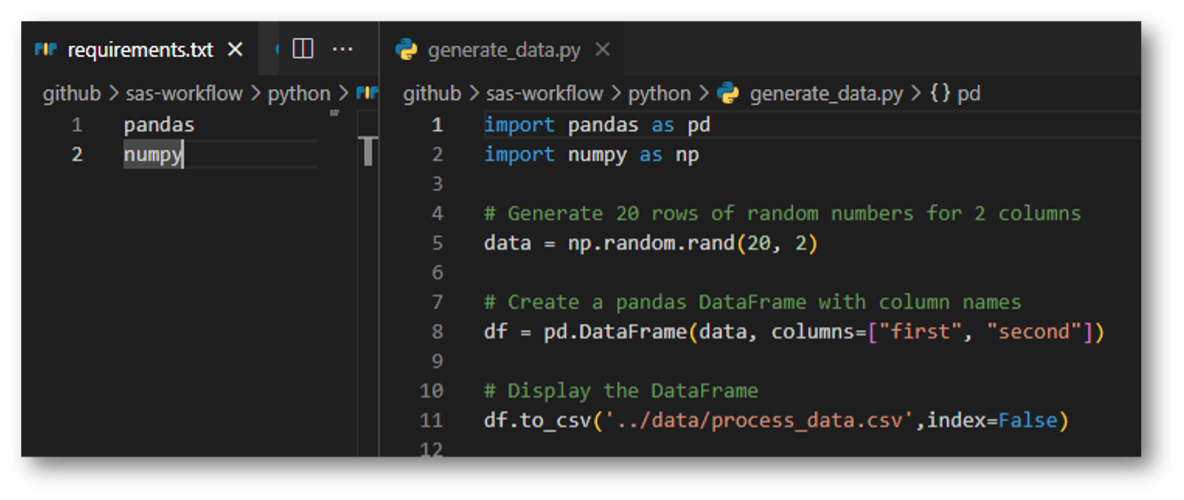
Your requirements file should contain all package dependencies needed by your Python code (in this case, just pandas and numpy). The code in our example here is overly simple, while in reality you could have anything from complex ETL code to machine learning models. You could even have serialized models here (i.e., pickled models, ONNX, etc.) that run before handing information back over to the workflow in the form of a file or database update.
Automate SAS scripts
Remember, my goal here is to allow my SAS developers to work in any environment they are comforable in, collaborate with Python users, and automate at least part of my clunky old legacy process. So, instead of manually creating new shell scripts to run on my production Linux server every time someone updates the main branch, I want to automate that through GitHub Actions so neither my SAS nor Python developers have to ever worry about creating shell scripts.
I want to create a script that will look in my code folder and generate individual scripts for each SAS code file. Each script will run the SAS program in batch and write the log to a file that matches the program name plus the date and time. I want the date and time to match when the code is run (not when the script was created). To help me test this in my EG installation on my Windows desktop, I also create a batch file that does the same thing.
Most of the first 20 or so lines of the generate script really belong in a config file to improve portability across systems. But for simplicity, everything is currently hard-coded into the script.
The main loop looks through the target directory and builds a script and batch file for each SAS code file found in the target directory. These get dropped off in the /scripts directory. To summarize:
- $TARGET_DIR – user defined folder to look for SAS code.
- -maxdepth 1 – only look in the current folder. Don’t recurse.
- -type f – look for files (as opposed to directories).
- -name “*.sas” – only include files that end with the 4 characters “.sas”.
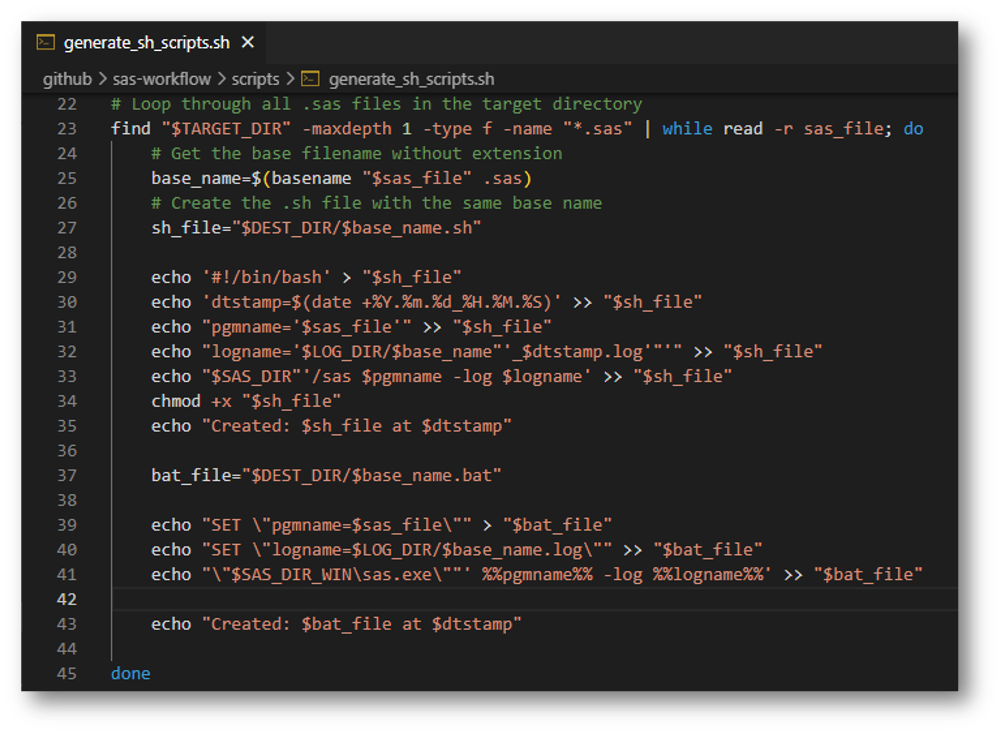
Once the script is finished, I can run it within Viya Workbench to test that it does what I want. One thing to confirm is that the script is executable. Line 34 does this for us on each script it creates so we don’t have to worry about it later, but if you have security concerns, you could omit this line and run the command prior to runtime on your production server. You’ll need to make sure to run the same command on the generate_sh_script.sh file before running.
From the Terminal (just click on the Terminal tab at the bottom of Viya Workbench) navigate to the scripts folder in your repo and run the script:
>cd sas-workflow/scripts
>chmod +x generate_sh_scripts.sh
>./generate_sh_scripts.sh
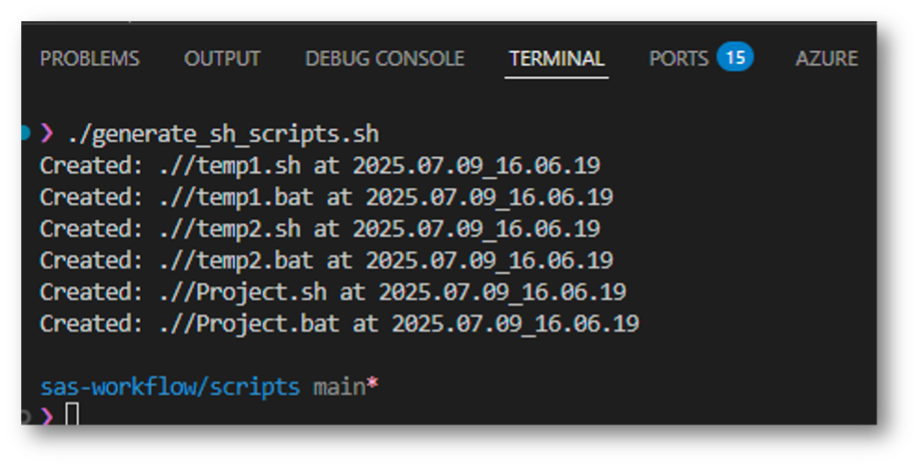
Note that you need to run this command from within the /scripts folder. We’ll make sure to take care of that with our GitHub action later on.
Voila, I now have my scripts. The single script I created will automatically generate all the necessary scripts needed for automation. That’s great, but I want to be able to run this script automatically, regardless of who adds code to the repository, so that my production process always has the most up-to-date code.
Set up the GitHub Actions
GitHub Actions is a powerful tool that lets you automate nearly anything you need. In this case, I’m going to use an action to build my shell scripts that will be picked up by my production server. It’s also going to run that Python code to create data that may be needed by the rest of my process.
When I initially got going on this project, I started with a preconfigured simple workflow and then added in the custom components I needed. This is typically the easiest way to get started with a new workflow. Try it out by going to your repository and click the Actions tab. From here, you can create simple workflows using preconfigured templates, custom workflows, or a wide array of other actions already created by other developers within the GitHub marketplace. If you’re feeling particularly creative, you can even add your own to the marketplace.
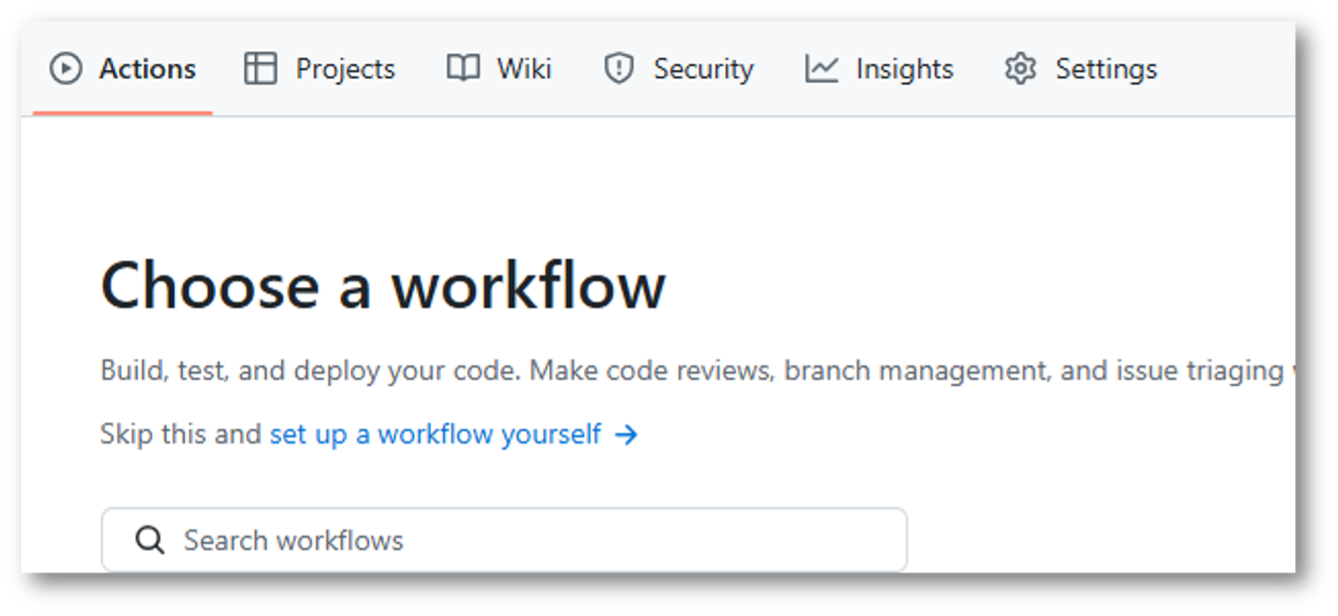
Type “simple workflow” into the search and hit enter to find this easy initial workflow. Then commit it to your repo and GitHub will do the rest. You’ll notice it puts a .yml in a new folder called “.Github/workflows”. This is the default path in which GitHub looks for actions to perform. You don’t need to do anything else.
As I joked about earlier, the actual action is in a .yml (not .yaml) file. Once I create the basic template in GitHub for my workflow and push it to the repo, I can pull the repo into Viya Workbench and edit the file there. You could just as easily edit the yml file in GitHub, but I like the ease of Viya Workbench with its full Visual Studio Code IDE and the ability to use other extensions I installed on VS Code to do things like automatic linting so I don’t mess up the syntax.
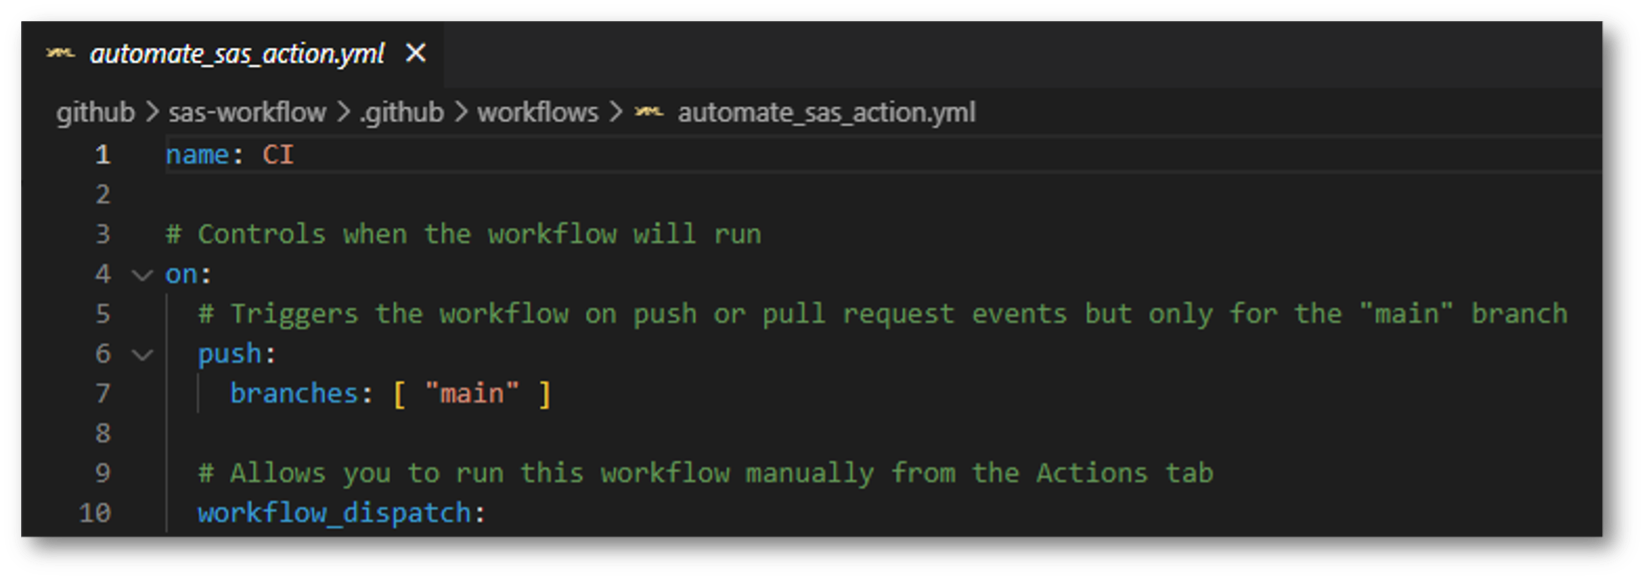
Let’s peruse the action.yml file and note the things I added/modified from the simple workflow GitHub provides in the marketplace.
One of the most important components is the trigger, which tells GitHub under what conditions to actually run this action. The trigger I selected is any push to the main branch. There are a lot of options that let you get really specific with when you want to run the action. In our case, it might have been a good idea to use the paths option since we only want to recreate our scripts every time our SAS code is updated.
on:
   push:
      paths:
         - 'sub-project/**'
         - '!sub-project/docs/**
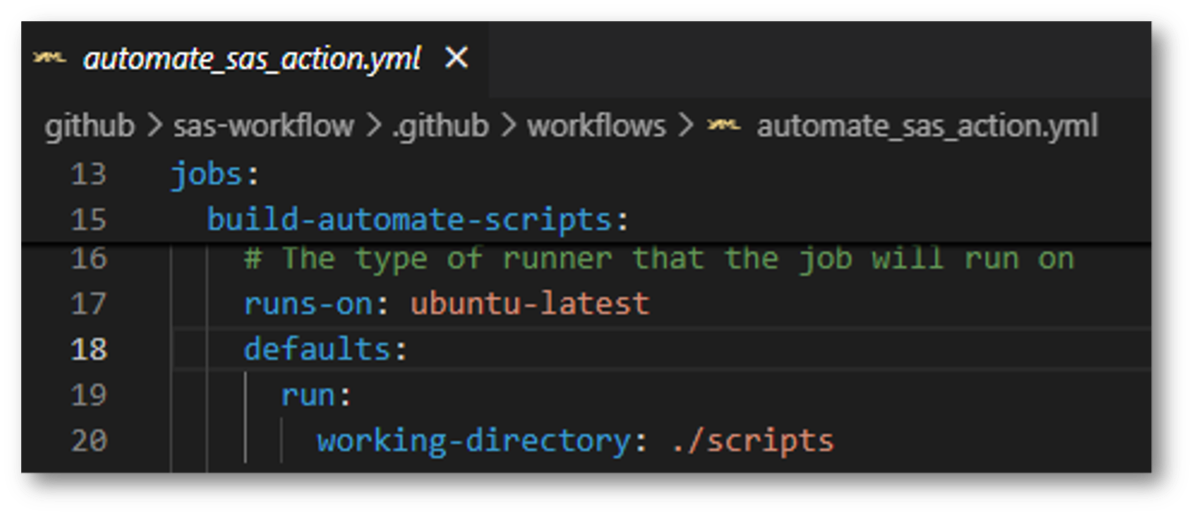
In the jobs section, note the runs-on section which specifies the OS to use. It also specifies the working directory. Remember above where we had to navigate to the scripts directory to run the generate script? This tells the container to nagivate to that same directory and work from there.
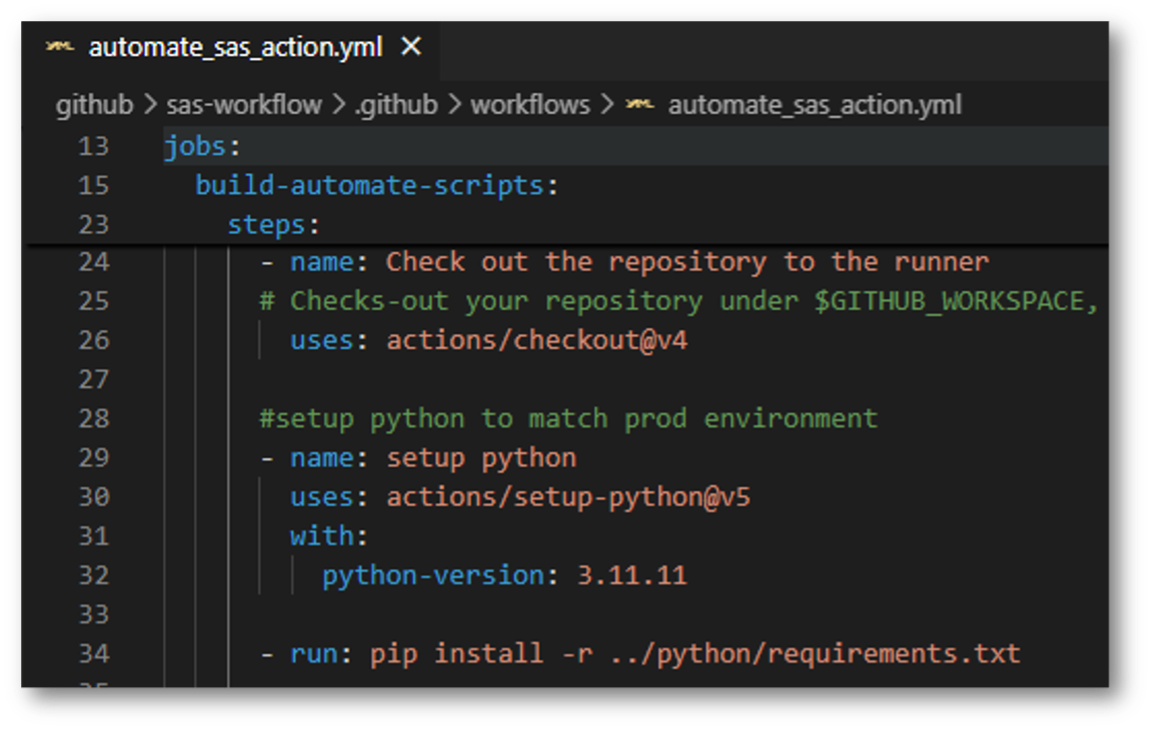
And now for the fun stuff. Within the steps section, you need to use name/uses or name/run pairs. Here, you can write custom commands similar to those you’d use in the command line, or leverage actions available in the ever-growing GitHub Actions marketplace. I use both approaches here so you can see how they work.
To summarize the first handful of steps which set up our container:
- Line 26 – checkout the repo, using a predefined action from the marketplace.
- Line 30 – set up the Python environment. Specify Python version 3.11.11.
- Line 34 – install required Python dependencies listed in the requirements file within the repo.
The next section of steps runs the desired commands and updates the repo:
- Line 38 – runs the generate script.
- Line 42 – runs the Python data generation script.
- Line 46/47 – this is important: tell the environment to use the default GITHUB_TOKEN. Without this, you won’t be able to push back to your repo.
- Line 48 – Notice the pipe “|” which lets you run multiple lines.
- Line 49/50 – this is required. For an auto action like this, I like to call the user some sort of bot and leave the email blank so it’s clear this was an automated action.
- Line 51-53 – Git commands to add/commit/push.

And that’s it! This is a relatively straightforward action, but feel free to explore the documentation for additional options.
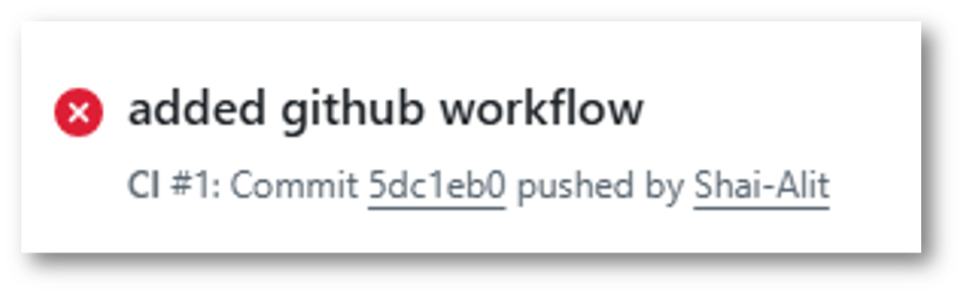
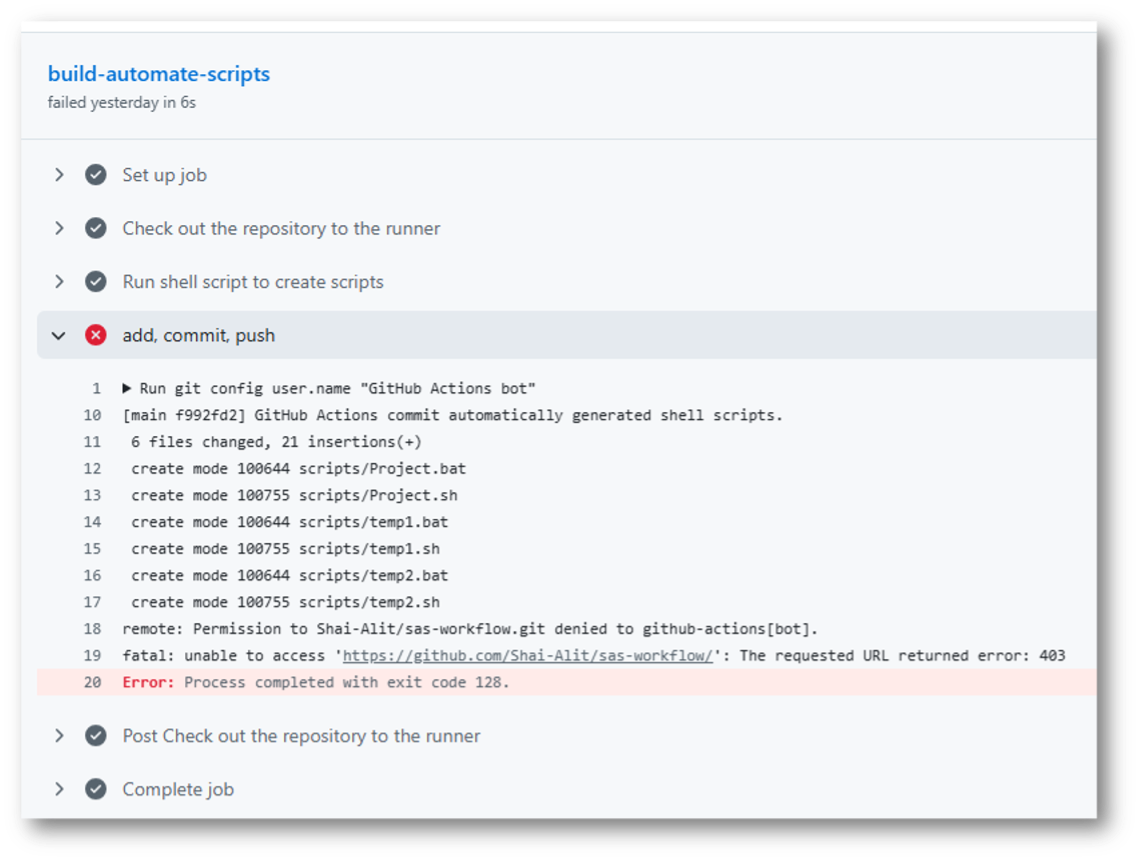
One final gotcha: if you push this updated file as-is, the action will fail. That’s because it tries to push the new files back to the repository but doesn’t have the necessary permissions.
In a Viya Workbench terminal, type:
>Git add –all
>Git commit -m “added Github workflow”
>Git push
Clicking on the attempt and looking at the failed action, we can see there’s a Permission Denied error on the add/commit/push step (line 45 in the actions.yml file).
To allow GitHub to push the changes made by the scripts back to the repo, you’ll need to make a change in your GitHub settings for your repo. Under the repo’s Settings tab, click on Actions → General and then scroll down to the Workflow Permissions section. Make sure you select the “Read and write permissions” radio button and save the changes.

There’s a note that this uses the default GITHUB_TOKEN. Remember, we specified in the actions.yml file (line 47) that the environment should use this token. You could set up your own more granular permissions and/or use something like a personal access token if you wish, but I’ll stick to the default GitHub token here for simplicity’s sake.
Now, on my production server, all I need is one script that is scheduled using cron. I don’t cover that here, but it controls the entire process instead of having to manually create scheduled actions for each script. This one script pulls my repository from GitHub, which contains all my code and scripts, and then runs each script in the desired order. I never have to remember to check for new code or rebuild scripts.
Summary
We started with a legacy SAS EG project where the process to get the code to run on the production server was completely manual. In this walkthrough, we automated much of the process using Viya Workbench and GitHub Actions. We also integrated Python into the process, enabling SAS and Python developers to collaborate through a shared GitHub repository. This setup combines elements from both environments and ensures the production process stays up to date automatically. This highlights how a legacy process can be quickly and easily modernized with no change to the original code in a way that will still work with open-source and more modern SAS programming and AI/ML techniques in SAS Viya Workbench and SAS Viya.